Learn to 3D Print
What is 3D Printing?
“Like an office printer that puts 2D digital files on a piece of paper, a 3D printer creates components by depositing thin layers of material one after another using a digital blueprint until the exact component required has been created” – whitehouse.gov
“Additive manufacturing or 3D printing is a process of making a three-dimensional solid object of virtually any shape from a digital model. 3D printing is achieved an additive process, where successive layers of material are laid down in different shapes” – Wikipedia
Select a topic below to learn more about that area of 3d printing, or request more information about your 3D Printing project.
3D Printing Basics
How 3D Printing Works
Although there are more than a dozen technologies, and just as many materials for 3d printing, the basic guiding principles for how 3d printing works is the same throughout. 3D printing is done layer by layer, one layer at a time – by either melting and extruding material, curing material, binding, laminating, or sintering. These individual cross-sections, of which the layer thickness is usually measured in microns, are layered on top of each other until the 3d printed object emerges.
How to 3D print (what you need):
- A 3D printable file (.STL)In order to print, the first and most important requirement is a 3d file. Although there are many file extensions for digital 3d files, most printers read .STL files. .STL files can be exported from nearly any 3d design software. A 3d printable .STL file can be obtained 2 ways:
-
- Make a file (see our sections on free and commercial 3d modeling software)
- Download a file (see our free 3d models section)
-
- Slicing Software
Slicing software prepares your 3D file for the 3D printing process. Normally, there is a proprietary slicing software that corresponds with a given 3d printer. However, there are some other 3rd party slicing programs available:- Slic3r
- Cura
- Simplify 3D
- Craftware
- A 3D Printer
See our section on buying a 3D printer or reach out to and we can help you with your printing needs. -
File Requirements:
- Model must be water-tight
- Normals must be unified
- All components must have thickness
3D printing files can be diagnosed and repaired with software like NetFabb.
Free 3D Models
SketchFab

Sketchfab does a few things. Primarily, it is the “youtube” of 3d printing, or as Sketchfab puts it, “a web service to publish, share and embed interactive 3D models on web pages, and display them in real-time without a plugin.“ This allows people link to embedded 3d models on facebook or on websites that can be viewed and spun around.
In addition, you can search Sketchfab for downloadable files to print. Many of these are from 3d
scans that have been uploaded to the site, but many are high quality designs and figurines.My Mini Factory

My Mini Factory is 3D file library geared mainly towards offering files that have been tested on desktop 3d printers. Although the files are mainly figurines and toys from fictional fandom, it also has simple home goods and products.
In addition, you can search Sketchfab for downloadable files to print. Many of these are from 3d
scans that have been uploaded to the site, but many are high quality designs and figurines.Turbo Squid

Turbo Squid provides a stock of high quality 3d models available for purchase. The library of models is robust and geared towards professional use – from animation to architectural rendering. Not all files will be 3d printable, but it’s a great resource when a specific high quality file may be
needed.
CG Trader

CG Trader is a high quality 3d file market place based in Lithuania. It is a 3d design market place primarily for computer graphics, virtual reality, and animation professionals – but many designs can be used for 3D printing.
Instructables

Instructables, acquired by enterprise design software company Autodesk in 2011, is an online community of DIY enthusiasts sharing their projects. Although most of these projects are not 3d printing based, many are.
In addition, you can search Sketchfab for downloadable files to print. Many of these are from 3d
scans that have been uploaded to the site, but many are high quality designs and figurines.Pinshape

Pinshape has an intuitive interface for searching for different categories of 3D models including figurines, toys, and home goods. However, many of the models cost money and many others are not printable. It is geared more for desktop printers.
Thingiverse

Thingiverse is Makerbot’s file library for sharing and downloading 3d printable designs. It is very difficult to navigate and poorly designed, but has a good foundation of models uploaded by hobbyists.
3D Modeling Software
In order to make your object print as smoothly as possible, object files should be in .STL format, have solid faces, and consist of manifold geometry. Depending on the complexity of your desired design, different modeling programs offer unique commands and functions that will enable you to create more intricate prints. Creating a 3D printable design file can be tedious and very time consuming, but there are many resources available to help first time and experienced designers create successful prints. The list below are some of the more popular design software packages that have a large library of tools, whether it be video resources, how-to documents, or a strong online community.
[one_half last=”no”]
Commercial 3D Modeling Software
Zbrush
AutoCAD
Maya
Rhino 3D
Solidworks
Geomagic Design
Cheetah 3DFree 3D Modeling Software
The following software are all free and available online. These are great when teaching a large group of people who are just beginning in the field of 3D printing design. In order to save space on computers, these programs are able to be saved on flash drives or other external memory, allowing users to work on designs at any computer. Although these programs are free, many are extremely powerful and are comparable to the more commercially owned, expensive software. Files that are designed with these programs are able to be printed on our printers.
Blender

(source) Download Blender
Blender Tutorials
Blender User ManualBlender is a free, professional, open source animation and modeling software. This product was initially released in 1995 with the intentions of being solely for creating animated films and various visual effects, but has since grown to be one of the most popular platforms for 3D printing design. Blender is updated very frequently with new additions to create more intricate designs and more consistent files to ultimately provide better prints. Since it is open source, it has a very large online community of avid users and tutorials to help you get started.
Sculptris

(source) Download Sculptris
Sculptris Tutorials
Sculptris Online CommunitySculptris is primarily a virtual sculpting program focusing on imitating the properties of clay modeling. The program was developed in 2009, and has since then been updated frequently. Sculptris is ideal for those who wish to create and print more “organic” looking models, or character sculptures; users are able to pinch, twist, and pull virtual models to create a handmade effect.
Tinkercad

(source) Download Tinkercad
Tinkercad Tutorials
Tinkercad Online Community
[/one_half]
Tinkercad is ideal for a beginner in 3D design. It is an easy to use, webbased application, meaning you can access it straight from your web browser. Tinkercad aims to create a learning environment that will enable children and adults to comprehend complex digital design functions by providing tutorials, lessons, and challenges through their online community. Users are able to create a printable, finished product on this web based application and save them by creating a free user account.SketchUp Make

(source) Download SketchUp Make
SketchUp Make Tutorials
SketchUp Make Online CommunitySketchUp Make, formerly known as Google SketchUp, is a 3D modeling computer program that is used primarily for architecture design, interior design, and civil/mechanical engineering applications. It is the free version of the professional version, SketchUp Pro. The program provides an open sourced library that boasts as being the world’s biggest repository of free 3D models. SketchUp is unique to other design platforms due to it’s fluidity of designing models, which was meant to imitate drawing by hand.
OpenSCAD

(source) Download OpenSCAD
OpenSCAD Tutorials
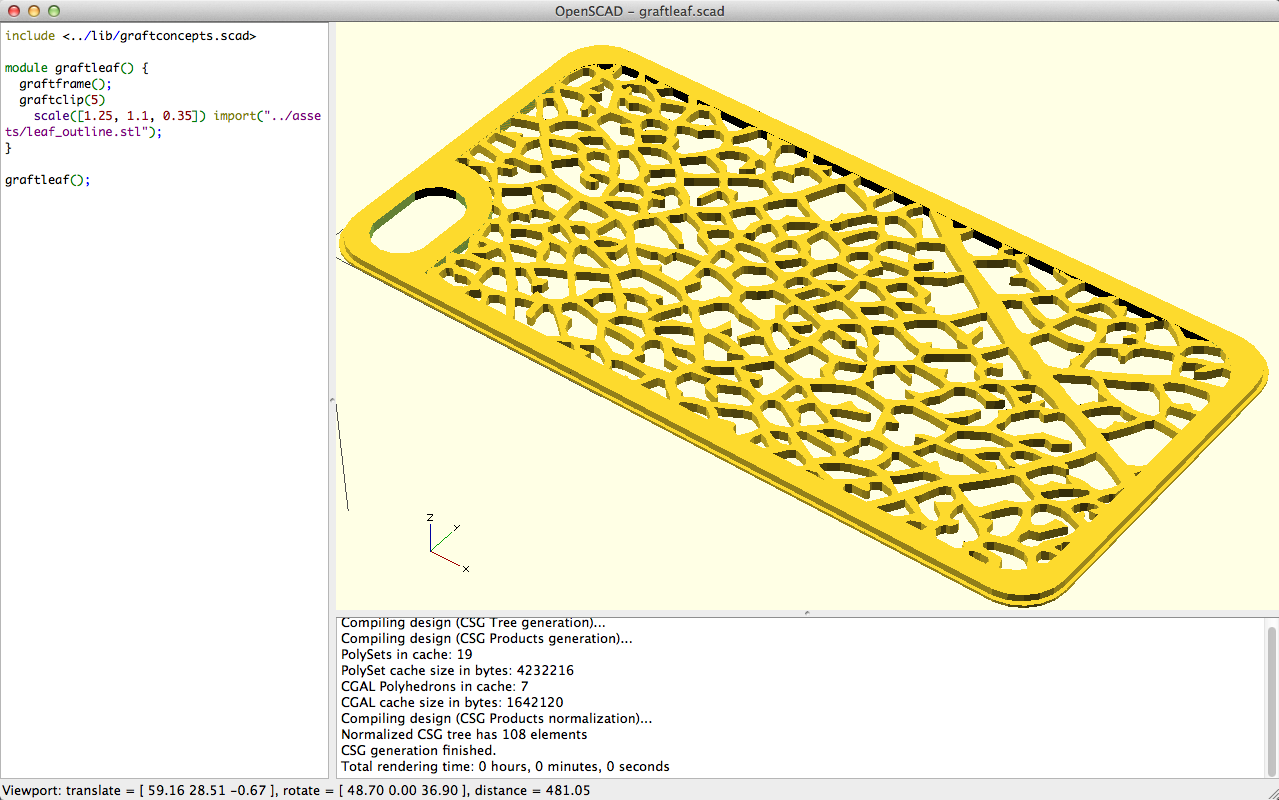
OpenSCAD Online CommunityOpenSCAD is a more intermediate level designing platform that acts like a compiler rather than an artistic modeling software. Known as the “Programmers Solid 3D CAD Modeller”, the user inputs code, which is then compiled on the program to generate accurate complex objects such as gears. It offers 2 different kinds of 3D modeling, Constructive Solid Geometry, and extrusion of 2D objects into 3D space. OpenSCAD is extremely useful for experienced modellers that wish to learn how to apply code in a 3D modelling environment. The program is able to be opened and used through a web browser by following this link.
Wings3D

(source) Download Wings3D
Wings3D Tutorials
Wings3D Online Community
Wings3D is a free, opensource subdivision polygon modeling platform. It is solely for the creation of low to mid range complexity polygon models and does not support animation. Although it is a relatively basic design platform, it has the capability to export to external rendering software for further editing, such as Blender. Wings3D has unique icons for each selection mode, which makes it a favorable design platform for beginners that want to quickly learn functions to create an object.FreeCAD

(source) Download FreeCAD
FreeCAD Tutorials
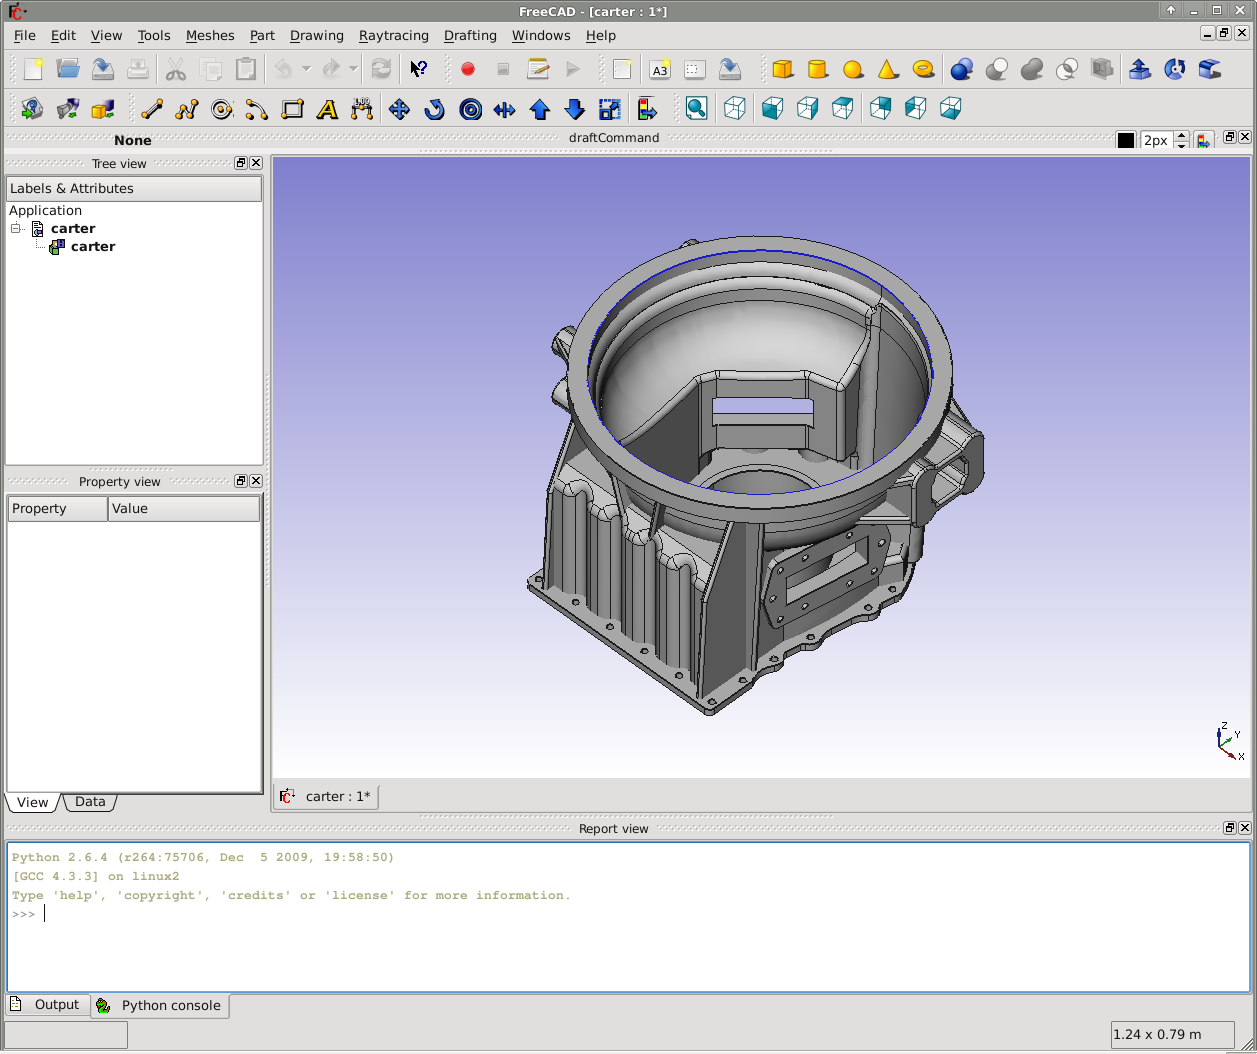
FreeCAD Online CommunityFreeCAD is a mechanical engineering opensourced design platform, but has functions that allow for product design, architecture and other engineering concentrations. It was initially released in 2002, and has similar tools to many paid programs such as Autodesk, SolidWorks and Solid Edge. FreeCAD uses modular software architecture which enables users to more easily manipulate specific parts of an object without jeopardizing the integrity of surrounding vertices.
Commercial 3D Modeling Software
These software packages are paid packages that are more typically used for professionally made designs. These packages typically run from a few hundred to a thousand dollars per license, and come with direct customer service options. As opposed to the consumer software, these are not as easily transferable to an external memory source due to their licensing limitations. All prices listed are for Single User Licenses.
Zbrush

(source) Purchase Zbrush ($795)
Zbrush is a digital sculpting platform that uses a proprietary “pixol” technology that stores depth, material, lighting and color information for all the objects on screen, providing a more detailed modeling experience. However, when you export Zbrush files to different formats such as JPEG or PNG, that information is lost and the object is flattened. Zbrush is used primarily for “organic” modeling and creates high resolution models to use in animations or movies.AutoCAD

(source) Purchase Here ($1680 annually with three year commitment or $2,520 monthly, Student Version free)
AutoCAD is perhaps the most well known commercial design platform, primarily used for drafting engineering projects. The product is in its 30th generation, and now has a desktop, mobile, and cloud based options. The newest iteration of the program has new “intelligent” tools such as Smart Dimensioning, Coordination Modeling and Enhanced PDF’s.
Maya

(source) Purchase Here ($1470 annually, Student Version free)
Maya is a professional animation and design created by Autodesk used to create interactive 3D applications such as animated film, video games or visual effects. This program requires a very strong graphics card and a minimum of 4GB ram, but recommends an 8 GB minimum. This tool is often compared to Blender, which has similar functionality and is open sourced.
Rhino 3D

(source) Purchase Here ($995)
Rhino 3D is a 3D computer graphics platform that is based around the NURBS mathematical
model, which focuses on creating mathematically accurate representations of curves and surfaces, which makes it unique against polygon based design platforms. Users are able to create complex shapes and objects, and export those objects without compromising its form. This program is compatible with over 21 file types without use of external plugins, making it convenient to transfer to 3D printing file types.Solidworks

(source) Purchase Here ($3995, or $1295 annually, Student Version $150 annually)
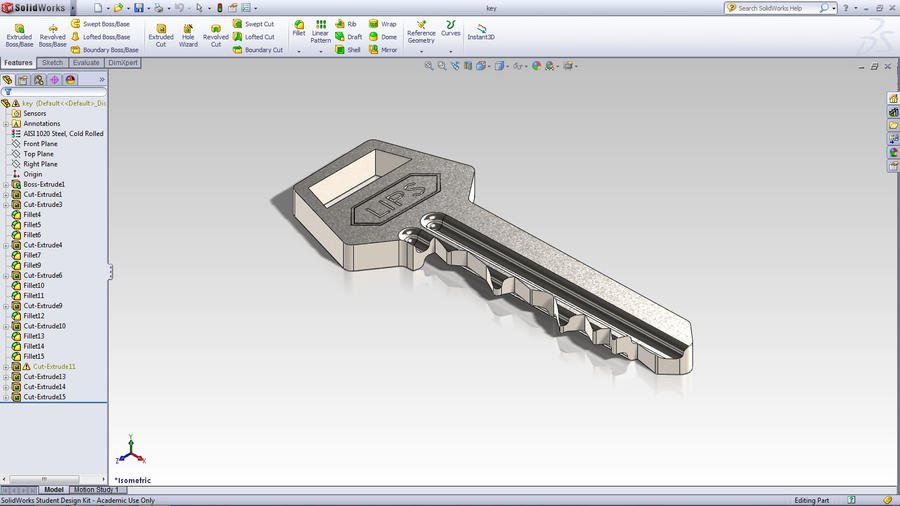
Solidworks is a popular Microsoft Windows solid modeling platform used by over 2 million engineers. This software relies on a parametric featurebased approach to creating models, meaning the user is able to accurately create shapes of desired specifications by inputting predetermined dimensions into the program. Models in solidworks typically begin as a 2D sketch, and converted into 3D drawings.
Geomagic Design

(source) Purchase Here (Personal use $199, Professional ~$1,000)
Geomagic Design is a professional, mechanical engineering software platform developed in 1997 and purchased by 3D systems in 2013. The software has an integrated system which allows for the use of a blue LED structured light 3D scanner. The newer software is compatible with 3D Systems’ Touch haptic device line, which enables users to provide and receive touch feedback from their virtual design based on the specified material’s properties.
Cheetah 3D

(source) Purchase Here ($99)
Cheetah 3D is a 3D modeling software primarily aimed at novice designers and focuses on providing an easy to learn design environment. Users are able to create polygon meshes, bezier curves and other geometric shapes by using subdivision surfacing. This platform is used in animation and rendering, and has the ability to export files to 3D printing and game development platforms.
Repair 3D Models
Learn how to repair your 3D files and ready them for the 3D printing process on our guide to repairing 3D files.
3D Printing Use Cases
“With 3D printing, we can actually create structures that are more intricate than any other manufacturing technology – or, in fact, are impossible to build any other way” – Lisa Harouni (primer on 3D printing)
The 3D printing process provides very specific advantages versus traditional manufacturing methods:
- Complex Geometry
- Lighter and Stronger Parts
- Rapid Prototyping (shorter design cycle/ iteration)
- Tool-less Small Runs
- Customization
- On-demand Manufacturing
- Waste Reduction
Limitations of 3D Printing
What factors limit what can be 3d printed? While 3d printing has a number of advantages and excellent use cases, it is important to understand some of the limitations of what cannot be printed. In many cases, knowing the limitations of specific printers and printing techniques will help guide the design process to ensure a successful end result.
Limitations of 3d printing can be broken down in the following categories:
Size
Minimum size – If an object is too small, it may be difficult to remove from the printer, or may lose legibility of design details.
Maximum size – Depending on the bounding box volume of the printer, there will be a maximum size of a single print that can be produced.
Resolution
Because 3d printers print layer by layer, the resolution of a 3d printer is often measured by the thickness of each layer. Units for this may be in inches, millimeters, or microns. On typical desktop 3d printers, the layer resolution can range from 100 microns (quality) to 340 microns (low quality setting) More often than not, there is a trade off with print time and print resolution.
Material/ Material Properties
Surface Finish/ Look and Feel – Many 3d printing methods will leave visible layer striations on the printed object. This is an artifact of an object being produced layer by layer. These striations will vary from material to material and are reduced by higher quality printers and high resolution prints. If printing from a desktop printer using PLA or ABS plastic, there is likely to be support material that will need to be manually removed. This can leave unsightly scarring on the finished print.
Tension/ Compression – Some materials may be weak in tension or compression. Depending on the structural needs and integrity of what is being printed, this can be very important.
Flexibility/ Rigidity – Is a 3d printed object meant to snap, bend, click into place, or hold something? Many materials have varying strength and rigidity which may need to be taken into account.
Strength/ Durability – Is the 3d print meant to be handled? Is the 3d print meant to be functional? These questions may eliminate many materials as viable options for printing specific objects.
UV Sensitivity – 3d printers that use the stereolithography method of printing (like the Form 1, Form1+, and Form2) frequently work by using UV light to cure liquid resin layer by layer to form an object. Some of these materials may deteriorate or discolor over time (especially if continued exposure to UV light or set by a window.)
Other properties – Many parts will not be food safe, dishwasher safe, recyclable, or watertight, making them poor choices for functional products.
Geometry
The design process for 3d printing is more limited than the process of creating 2d graphics in a program like Photoshop or Illustrator. Where in 2D design programs, we can are free to add, subtract, invert, and transform freely, 3D objects must be implicitly engineered from the start and must adhere to laws of physics. Important questions to ask in the design process includes: How will this stand up? What is the orientation? How thick should these walls be? Will this cantilever, overhang, intersecting surface, or other feature work in the real world? Creating objects to be 3d printed can mean optimizing their geometry while designing to work within the constraints of the printing process. Here are some typical geometric constraints.
Wall Thickness – Different 3D printing materials will require a minimum wall thickness of a 3D model to ensure its printability.
Distance between parts – If printing something with interlocking parts, there may be a tolerance/ certain distance necessary between the parts to ensure that they do not get stuck together.
Time
While different methods of 3d printing may take varying amounts of time to produce the same object, 3d printing is a slow process. The print time may depend on the orientation of the printed object and can vary from machine to machine. Generally, 3d printing is considered very quick as a means for producing one-off iterative prototypes or customized products, but is a prohibitively slow process for larger run production.
Price
It can be argued that all manufacturing constraints boil down to price. Often, after considering the cost of materials or printing, price of 3d printing an object may be determined to be a cost-ineffective way of manufacturing something. If printing through a 3d printing service or bureau, there are a number of ways that price per part may be calculated.
Material – Some materials are much more expensive than other materials. For example, the cost of direct metal laser sintering far exceeds the price for printing a plastic material version of the same object.
Volume – Typically volume is measured in cubic centimeters and measured the volume of whatever material is used. For instance, at Make Mode, we charge $1.25/ cubic cm for ABS plastic and $1.00/ cubic cm for Full Color Sandstone.
Support Material Volume – If an object is being printed using FDM technology, there will likely need to be support material. Even if the support material is a secondary dissolvable material, support material costs will often be as much as the actual print material.
Bounding Box Volume – For some methods/ materials of printing like the “strong and flexible” material at Shapeways, volume of the bounding box of the object may be taken into account. This is because although an object may have a low density and small material volume, it may take up a large amount of the build volume of the printer, preventing other models from being printed at the same time.
Time – Service bureaus will sometimes charge by hour of print time.
Weight – This pricing structure is typically used in larger volume printing applications using spooled PLA or ABS. May be charged by gram of material used.
Reliability
When using desktop 3d printers, sometimes the print can fail in mid-print. This failure rate of printers depends greatly on the quality of the machine. Higher-end, industrial 3d printers will be far more reliable than the typical desktop printer. Although, desktop 3d printer users have active communities and support forums, strong warranties aren’t ubiquitous. Many times, printers may have to be calibrated and tweaked until they work consistently. Common failures for desktop FDM printers will include clogged extruders, unleveled build plates, or temperature errors.
What do People 3D Print?
Given the limitations mentioned above, it’s clear that there are many cases in which 3d printing may not be the best manufacturing method for making large runs, large objects, or consumer products. However, there are a multitude of great use cases for 3d printing.
The persona of someone using a 3d printing service will typically fall into one of these categories:
- Creative Professional – Architects, advertisers/event promoters, industrial designers, jewelry designers, etc.
- Hobbyist – Home tinkerers/ DIY enthusiasts
- Consumers – People who have downloaded a file and are looking to manufacture it
3D Printed objects are usually broken up into the falling categories:
- Hobby/ DIY
- Prototypes
- Scale Models/ Presentation Models
- Art/ Jewelry/ Fashion
- Gadget Accessories
- Home Goods
Guide to Buying a 3D Printer
Often, the best way to understand 3d printing is to operate one. For those interested in purchasing a 3D printer, here is a short guide. First, 3D printers are separated into a few categories.
Consumer/ Prosumer ($300-$3,000)
Consumer 3D printers are often referred to as desktop models. More often than not, the use the FDM (fused deposition modeling) method of printing.
Highly Ranked Desktop 3D Printers:
- Makergear M2
- LulzBot TAZ 5
- DeltaWASP
- FlashForge Creator Pro
- Ultimaker 2
- Witbox
Budget 3D Printers:
- Craftbot
- Printrbot Simple Metal
- UP Mini
- FlashForge Creator
Resin 3D Printers:
- Form 1+/2
Professional ($5,000 – $80,000
- (FDM) – UprintSEPlus (~$25,000)
- (3DP) – Projet 660 (~$60,000)
- (CLIP) – Carbon3D (~$40,000/ year)
Industrial ($100,000 +)
- (SLS) – EOS Formiga P110
- (DMLS) – ExOne Exerial
- (SLS) Stratasys Fortus 900mc
How to Learn 3D Printing
Classes/ Workshops
- Make Mode (NYC)
- Course Horse (Search local 3d printing courses)
- Pixel Practice
Online Courses
- Lynda
- Coursera
Continued Education Programs
- NYU
- New York City College of Technology
- Montclair State University
Self Taught/ Online Community Support
- Lulzbot Forums
- Rep Rap Forums
- Shapeways Forums
- r/3DPrinting
- 3DPrintBoard.com
- 3DPrintingForum.org
- SoliForums
- 3Dhubs Forums
- 3DPrintForums
3D Scanning

An alternative to designing an object using design software is using a 3D scanner to scan an object in real space that you wish to duplicate/ modify and print. A 3D Scanner uses lasers, lights or X-rays to generate dense point clouds or polygon meshes that are read by a 3D printer. Typically, a scanner will take thousands or even millions of measurements for an object. Scanners come with a dedicated scanning software that allows the user to modify and fix the digital scan. 3D scanning is fairly new to 3D printing, so there is more research that needs to be done to improve the quality of the scans and to decrease the amount of post scan editing that needs to be done before the object can be printed.Scanning Various Materials
Types of 3D Scanning
Buy a 3D Scanner
Post-Scan Editing3D Scanning Various Materials
Ready to Scan Objects
Objects that are ready to scan will allow the laser in the scanner to easily bounce back to the detector to create an accurate 3D model of the object. The following are some objects that will produce successful prints without any preparation.
Single Colored – The best colored surfaces for scanning are light or red colors. Multicolored objects can be scanned, but usually require adjusting settings in the scanner prior to scanning.
Matte – Also considered dull surface texture. Matte will create a sharp and visible line that detectors can easily pick up.
Close-Cropped – An object that has any kind of fabric or fur should be cut so that the fibers are short. Long fibers can cause the laser to reflect in different directions, thus providing an incorrect reading to the scanner.
Opaque – Objects that light cannot shine through are ideal for scanning and will prevent the detector from picking up stray signals.
Object Which Require Prepping
The following are types of objects that need external modifications to produce a successful scan.
Shiny Objects – Shiny or reflective surfaces will reflect the laser away from the sensors, leading to an incomplete scan.
Dark Objects – Colors that are dark, such as darker blues and greens tend to absorb the laser wavelength, causing holes in the scan.

Transparent Objects – The laser will pass through the object without relaying sufficient information to create an accurate 3D model.Examples of Preparation for 3D Scanning
White Powder – By covering your object in a white powder, you can create a favorable scannable surface. The laser will be able to bounce back to the detector and the scanner will receive enough good data to generate a solid 3D scan. Cornstarch, dry shampoo, talc and flour are all cheap and effective options.
Developer’s Spray – Aerosol spray that leaves a very fine white coating on the object. It easily wipes off when you’re done scanning the object.

Tempera Paint – White tempera paint is non toxic and is water-soluble. It dries smooth, which makes it an ideal scannable surface.Types of 3D Scanning
Laser Triangulation
This short range (<1m focal distance) scanning process uses a laser line or single laser point to scan across an object. A detector that is embedded into the scanner receives the reflected light, and uses trigonometric triangulation to calculate the distance from the object to the scanner. These measurements are then combined to create a 3D model of the scanned object.

Structured Light 3D Scanners
This type of scanning has a short range and is similar to Laser Triangulation. It is usually more accurate and higher resolution, but is less portable and requires specific white or blue light to function. The system projects linear patterns onto the object it is scanning, and receives information on the patterns the light makes on the edges of the object, which is used to calculate the distance from the scanner to the object’s surface. It uses similar mathematical calculations to create the digital model as the Laser Triangulation method.

Laser Pulse-based 3D Scanners
These long range (>2m focal distance) scanners work around the precise measurements of the speed of light. These types of scanners uses sensors that are accurate to picoseconds (one trillionth of a second!) to detect how long a laser takes to bounce back from the object from a predetermined distance. These types of scanners typically include a mirror that enables the scanner to scan 360 degrees around itself. This method is more time consuming than the previous two, but provide a longer range and higher resolution.
Laser Phase-shift 3D Scanners
This specific type of scanner works similarly to the previous type of scanner, but also has the capability to modulate the power of the laser beam. The detector in the scanner measures the phase of the laser being sent out compared to the returning laser beam. This makes this method more accurate and collects data faster.
Buy a 3D Scanner
Makerbot Digitizer
$799.00
This scanner will produce images in standard design files compatible with any 3D printer, but the system is optimized to work in conjunction with the MakerBot printer line. The MakerBot multi-scan technology allows the user to combine scans from multiple angles to create the most accurate 3D model.
NextEngine 3D Scanner
$2,995.00
Next Engine HD scanner provides 0.005 of an inch accuracy that uses electro-optical architecture and algorithms to coordinate laser arrays to scan in parallel. This leads to higher throughput and a better quality scan.
Scanify
$1263.83
This portable scanner fuses geometric and photometric stereo 3d recovery techniques and is created to capture high resolution 3D color images. This scanner is not designed to capture geometric features with flat surfaces and sharp corners, or cavities and protrusions.
Sense by Cubify
$399.00
Sense is a handheld scanner that provides an infinite scan size with an accuracy of 1.0 mm. It has automatic object recognition and has editing tools directly embedded in it’s software for quick editing. This scanner also comes in a battery powered ipad attachment called iSense, which is $499.00.
HandySCAN 3D
$25,000+
These are handheld scanners that have been developed to meet the needs of product development and engineering professionals. The scanners have an accuracy of .1mm and a resolution of up to .1 mm. They also have the ability to capture the colors of an object and incorporate them into the final mesh. Scan files can also be directly imported into 3D printing software without post-processing.
- HandySCAN 3DMatter and Form
$599.00
This scanner is an easily portable scanner that performs high resolution scans in as little as 5 minutes, capturing 2000 points per second. They are able to be used straight out of the box. Full color scans are available, and the scanner creates watertight meshes, decreasing post scan editing. The system provides multiple file types, allowing for compatibility with numerous printers.
Artec 3D Scanners
$14,200-27,600
Artec produces a line of portable 3D scanners that features an enhanced cooling system, which enables it to reach optimal operating temperatures faster and produce more accurate results. The corresponding software is not included and needs to be purchased separately. These scanners capture color information at 24 bbp and has a resolution of 1.3 mp. Moreover, the scanners have a resolution up to .1 mm, and accuracy of up to .05mm. Artec 3D Scanner
Post-Scan Editing
After the object is scanned, a digital 3D model will appear on your software. Often times, some post editing is required in an external editing software such as Blender, Netlabb or Meshmixer. In these programs, you have the ability to make the files smaller (decimate), smooth surfaces, among other tools. Some of the most common problems found in 3D scans are holes in the objects, extra geometry due to poor scanning, and non-manifold faces.
The following video was created by Tony Buser and provides a thorough example of how to post edit 3D scans to get them ready for printing.3D Scan Cleanup from Tony Buser on Vimeo.
Post Processing
What is ABS
Acrylonitrile butadiene styrene (ABS) is a thermoplastic polymer that is commonly used in 3D Printing. It has become a popular material choice in the field due to its impact resistance and toughness. ABS is commonly used to create interlocking pieces, such as Legos, or pin connected parts. It has a higher heat resistivity than PLA, thus requiring higher temperatures and a heated bed for optimal printing. Natural ABS filament has a milky beige color, but the material is able to be dyed and sold in a multitude of colors. When heated, ABS gives off a “melting plastic” smell, which infrequently can cause nausea and headaches, but sensitivity differs from person to person. ABS is typically chosen over PLA for projects that require a tougher exterior, or for final objects that will be exposed to harsher conditions, such as outdoors or frequent handling.
Printers that print ABS

Stratasys Mojo

Uprint SE

Makerbot Replicator 2xWhat is PLA
Polylactic Acid (PLA) is also a thermoplastic which is the most common material used in desktop and consumer 3d printers. It is derived from cornstarch and is biodegradable. Generally, it is less durable than ABS, but has less printing issues when used with consumer desktop 3d printers.
Printers that print in PLA/ABS
Makerbot Replicator 2

Ultimaker

3D Systems CubeHow to Smooth ABS & PLA plastic 3d prints
Because ABS plastic is printed using either FDM (Fused Deposition Modeling) or FFF (Fused Filament Fabrication), each layer will be visible in the final print. Even in higher level industrial machines at the finest resolution settings, there will be visible striations. If you are looking for a smoother finish on your prints, here are some options for post-processing.
Sanding
Materials
Microfiber towel
Sandpaper (100, 150,220, 320, and 400 grit)
Well ventilated area
Latex or Nitrile GlovesHow to do it
- Begin with a small grit number such as 80 or 100 grit. Work your way around the model using a small circular motion
- Slowly start to change grit number, changing when you notice the sandpaper is taking away more material than necessary around the imperfection.
- The 400 grit should only be used last in all situations. This particular grit is used to polish the area as opposed to fixing or smoothing any imperfections. Make sure you clear off any sanding residue before painting or priming the object.
Results
Sanding vs. Unsanding
Sanding is used to remove imperfections on the surface of the object. It can also remove most print lines by removing the excess material. Your object will be easier to prime and paint when it is smoothed out.
Oversanding
Sanding is a slow process and takes practice. Before you begin sanding, make sure you have numerous grits of sandpaper. Always begin with the most rough and work your way to the finest grit, which is primarily used for polishing. The larger grits are meant to take off the most material and remove the largest blemishes. Once you notice the blemish decreasing, move on to a larger grit number. Over sanding can happen very easily;it’s important to work in small circular motions slowly, and to always clear off the sanding debris so you have the best idea of how your object looks.
Acetone Vapor (Only for ABS Plastic)
Smoothing out 3d prints with acetone vapor is one way to smooth ABS prints with two major disadvantages. Firstly, acetone is a a very dangerous, hazardous, and flammable material. Also, the process is not the most consistent. We don’t recommend this process, but here is one way we found to smooth prints with acetone vapor.
Materials
Acetone
Empty Paint Can
Small Magnets
Paper Towels
GlovesHow to do it
- Make sure your ABS part is clean of any artifacts from printing or hand oils (can use alcohol to quickly wipe it)
- Use three paper towels, and cut them in half. Using the magnets to keep them in place, line the paint can.
- Use 4 of the magnets to create a stand for the ABS part on the lid of the paint can and place the part on top of the magnets.
- Pour about 4 ounces of Acetone, or enough to wet all of the paper towels. Turn the can in a clockwise motion to make sure all the Acetone was absorbed into the paper towels.
- Place the can over the object, resting on the lid.
- Wait 40 minutes. Do not touch the paint can or the object.
- In a fume hood or well ventilated area, lift off the can, being careful not to touch the object.
- Let the object set for about 3-4 hours (or until it is smooth and solid all over)
Results
Before/After
In this comparison, there are three large differences. The first being the most apparent, is the absence of print lines from the object. The acetone essentially melts the outer layer of the print, smoothing out the print lines and leaving a glossy exterior. The second difference is the slight change in size. Since you are melting the object, there will be a very small change in overall measurements. Keep that in mind when you’re planning your print. Finally, there is a slight loss in detail. This can be controlled by experimenting with different exposure times.
Very thin objects with fine detailing, or objects that have a large overhang are at risk for warping during the smoothing process. Consider using some kind of structural support during the vapor treatment if you plan on smoothing out objects with overhang to prevent the structure from warping and ultimately breaking.
There are many factors that play into smoothing out a surface. Depending on the structure of the object, it’s density, or size, each object requires a unique treatment time. There is no “standard” documentation about this process, so it does require patience and trial and error.
To remedy the still-apparent print lines, try printing at the highest resolution your printer is capable of before beginning the vapor bath treatment. Smaller print lines will smooth out more easily.
XTC-3D (Clear Epoxy)
XTC-3D is a two part solution made by Smooth On that is available here http://www.smooth-on.com/Epoxy-Coatings-XTC/c1397_1429/index.html . It is essentially an epoxy coating that went brushed over parts, will fill in the striated layers and dry to make parts much more durable and strong. You can also substitute this material for another clear epoxy two part solution.

Materials
XTC-3D Smooth-On Coating Kit
Wooden Popsicle Sticks
Graduated Plastic Medicine Cups
Aluminum Foil
Wax paper
Gloves
Paint BrushHow to do it
- Prepare your workspace. Create an aluminum foil tray by layering 2 pieces of aluminum foil and folding the edges. This will be where you pour your mixed product to allow for a longer working time.
Measure out Parts. The recipe for this resin is 1 parts Part B to 2 parts Part A. - Mix Part B with Part A. Pour all contents into the plastic container, and vigorously mix together until they form a smooth, miscible blend. Pour the solution onto the aluminum foil plate.
- Using a paint brush, apply a thin layer of epoxy (about .04 cm thick). The mixture will self-level once on the object.
- Allow the object to cure untouched in room temperature for about 3.5 hours. To speed up the curing process, a light heat source can be applied, such as a hair dryer on low heat.
Results
XTC-3D provides a glossy, protective coat over the object. It also can smooth out some of the fine details. A small amount of this solution is required to cover a large surface area. Use very thin coats and don’t worry too much about manually leveling out the compound on your object; XTC-3D levels itself when applied. Any dripping that occurs during application will be very apparent when the object cures and dries. One way to avoid this is to continuously brush the object until you notice XTC-3D begins to cure (it will start to become gummy).
Sandblasting
While getting a sandblasting kit for this purpose may not be practical and may require some testing, it is much faster and much more consistent than sanding by hand. It works very well for getting inside smaller crevices. After sandblasting, prints appear to have a more finished, matte surface. This finished surfaces lends itself well to being painted afterwards.
Tumbling

Tumbling is used frequently in the jewelry industry for polishing metals. It is also used for polishing nylon 3d prints made by selective laser sintering. It’s a versatile process that mostly is variable on what kind of media you are using. There are numerous kinds of media from ceramic, plastic, walnut shells, and steel balls (called steel shot). For tumbling processes, For ABS or PLA plastic 3d printed parts, you generally want an abrasive media for deburring rather than a polishing media. We recommend ceramic media – although there are a number of different variables that would require some testing including the shapes and sizes of the ceramic media.
This type of smoothing process is recommended for those who need to consistently, and on an ongoing basis, smooth multiple smaller parts.
Hot Air Gun

Because PLA and ABS plastic have relatively low melting points, striated layers can be minimized with a light application of concentrated hot air. It is important to remember that heating the parts will weaken them and increases the possibility of warping or breaking.
Painting ABS & PLA Plastic 3D Prints
Primers
Primer is used to coat an object before painting and provide an even base coat for the paint to stick to. There are different types of primers, such as filler primer, plastic primer and Adhesion promoter.
Filler primer expands when applied to the object, filling small holes and imperfections. This type of primer requires sanding when dry to smooth out the surface. It can leave a dusty residue, so it’s important to make sure that is cleared off before progressing to the next stage of painting.
Plastic primer is the typical standard primer. It applies as a smooth surface, no sanding required. Only one or two coats is necessary for it to be effective.Lastly, Adhesion Promoter primer usually has an affinity to the substrate that it’s being sprayed on. It is used to cover more difficult to spray surfaces such as plastic. It allows proper adhesion of the paint to the surface.
Materials
Spray-on filler primer ( We used Rustoleum Brand- Gray)
Paper Towels
Gloves
Sandpaper (100, 150,220, 320, and 400 grit)
Well ventilated areaHow to do it
- Sand away any large imperfections such as Printing seams, chips or holes.
- Begin by spraying a light coat around the object. Hold the spray paint can about 10 inches away from the object. If you spray too close, the spray paint may drip and form an uneven surface.
- Once the object is completely covered and dried, let sit for an hour and a half-2 hours or until the surface is not gummy to the touch.
- Begin sanding the primed surface. The surface should eventually be smooth and most layer lines should be gone.
- Repeat steps 2-4 as many times as necessary to obtain a completely smooth surface with no visible printed lines.
Results
The primer used left a residue on the surface of the object. It was able to be sanded smoothly, but the primer was sanded off in some areas, exposing the original object. Multiple coats are needed.
Airbrushing
Because of it’s ability to be controlled easier, and being waterbased and less toxic, airbrushing is a preferable process over spray painting.
Materials
Airbrush gun
Airbrush paint or acrylic paint with paint reducer
Wax Paper
Airbrush cleaner/ water
Paper Towels
Clips or cardboard square to hold object
Ventilation hoodHow to do it
- Ensure object is clear of debris and set on a movable surface (i.e. piece of cardboard)
- Make sure airbrush and all components are clean and free from debris.
- Prepare Paint. If paint is not specified for airbrushing, use the paint reducer to get a liquid consistency similar to water or slightly thicker.
- If paint is designated for airbrushing, shake bottle, and pour desired amount into gravity or siphon jar. Attach to airbrush.
- Turn on air compressor and allow color to enter the air brush. Allow airbrush to release color on a scrap piece of cardboard to get rid of excess paint and initial splatters.
- Start airbrushing off of the object, and use a sweeping motion as you airbrush over the object. Cover the object with a thin coat.
- Repeat step 6 as necessary to slowly build up desired color.
Results
Airbrushing is a favorable method of painting for smaller objects because of it’s ability to be controlled. We use a double action airbrush, which provides the ability to change the flow rate of the paint thus differing the intensity of the color. The result will be a thin, even coat that can be built up to a vibrant color.
Dripping
Visible drip marks on your object can be due to overspraying. One way to combat this is to always spray across your object. Never start or stop airbrushing while you’re airbrush is on the object. It could lead to dripping, uneven surfaces, and sputtering.
Spray Painting
Types of Spray Paint

Water Based – Includes: Acrylic, Co-polymers, latex and PVA
Oil Based – Includes: Enamel, and LacquerNot sure what kind of paint you have? Easy way to test: Take a cotton ball soaked with rubbing alcohol, nail polish remover or acetone and rub it on a dry painted surface. If paint is taken off or surface is affected, the paint is water based. If there is no apparent effects, the paint is solvent/ oil based.
Use this helpful chart that shows what types of paint are compatible with one another. Green means the paints are compatible, yellow means it can be done but may take longer to dry than usual, and the red combinations are best to be avoided.
Applying Metallic Finishes to ABS 3d prints
Outsourcing for Electroplating
There are companies that are able to coat your object in a very thin layer of metal using a process called electroplating. This method uses electric current to reduce dissolved metal cations to form a consistent, thin metal coating on an electrode, or, the object. By adding the additional layer of metal, the object’s surface will take the characteristics of the metal. Although this is a consistent and professional method, it is often very costly (The price to coat an object the size of a typical ballpoint pen is about $150). Since many makers wish to transform their objects to look metallic but don’t need the metallic properties of the surface, there have emerged other simpler and less expensive methods to obtain the same “look”.
Metallic Powder
One of the easier ways to get a metallic and shiny finish is to combine metallic powder and a clear epoxy coat to brush on prints.
Materials
XTC-3D Smooth-On Coating Kit
Metallic Powder
Aluminum Foil
Wooden Popsicle Stick
Graduated Plastic Medicine Cups
Wax paper
Paint brushHow to do it
- Prepare your workspace – Lay wax paper underneath your workstation for easy clean up. Create an aluminum foil tray by layering 2 pieces of aluminum foil and folding the edges. This will be where you pour your mixed product to allow for a longer working time.
- Mix Part A and Metallic Powder – The protocol for the epoxy solution is 1 part B and 2 parts A. In a small medicine measuring cup, mix Part A and 1 part metallic powder. (The same volume as part B). Mix well with a wooden popsicle stick until the powder is completely dissolved into Part A.
- Mix Part B with Part A/Powder solution – Pour all contents into the plastic container, and vigorously mix together until they form a smooth, miscible blend. There should be no bubbles or clumps of powder remaining. Pour the solution onto the aluminum foil plate.
- Using a paint brush, apply a thin layer of epoxy (about .04 cm thick). The mixture will self-level once on the object.
- Allow the object to cure untouched in room temperature for about 3.5 hours. To speed up the curing process, a light heat source can be applied, such as a hair dryer on low heat.
- Once the curing process is complete, use steel wool to polish the object. You can vary the polishing time to achieve the optimal metallic shine.
Before/After
This method will create a smooth, glossy, metallic surface on your object. The powder is completely mixed into the XTC-3D mixture, making it easy to apply.
Excess Powder
If too much powder is added to the mixture, the end result will have a rough texture and have a leafed gold look.
Polishing after Powder
After applying the powder XTC-3D mixture and allowing the object to set, shoe polish can be used to create an antique look. Dip a cloth into normal black or brown shoe polish, and move along the object using small circular motions. Allow to dry for a few hours, and then wipe the object using a clean microfiber cloth.
Applying a Gloss to ABS 3D Prints Using XTC-3D
Materials
XTC-3D Smooth-On Coating Kit
Wooden Popsicle Sticks
Graduated Plastic Medicine Cups
Aluminum Foil
Wax paper
Gloves
Paint BrushHow to do it
- Prepare your workspace. Create an aluminum foil tray by layering 2 pieces of aluminum foil and folding the edges. This will be where you pour your mixed product to allow for a longer working time.
- Measure out Parts – The recipe for this resin is 1 parts Part B to 2 parts Part A.
- Mix Part B with Part A – Pour all contents into the plastic container, and vigorously mix together until they form a smooth, miscible blend. Pour the solution onto the aluminum foil plate.
- Using a paint brush, apply a thin layer of epoxy (about .04 cm thick). The mixture will self-level once on the object.
- Allow the object to cure untouched in room temperature for about 3.5 hours. To speed up the curing process, a light heat source can be applied, such as a hair dryer on low heat.
Results
XTC-3D provides a glossy, protective coat over the object. It also can smooth out some of the fine details. A small amount of this solution is required to cover a large surface area. Use very thin coats and don’t worry too much about manually leveling out the compound on your object; XTC-3D levels itself when applied. Any dripping that occurs during application will be very apparent when the object cures and dries. One way to avoid this is to continuously brush the object until you notice XTC-3D begins to cure (it will start to become gummy).
Gloss Sprays and Wax
Rust-oleum Triple Thick Glaze and MinWax Polyacrylic both work fairly well in applying a gloss to ABS 3d prints. At least 3 coats in a well ventilated area are recommended.


